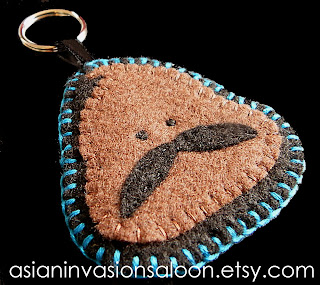
Mustachio'd Poo Keychains
Sunday, December 30, 2012
Revamping Stuff!
Hellllloooooo!
Just an FYI....I am currently in the process of redoing the format of my blog and hopefully my website so bear with me as I'm rebuilding, demolishing and trying to keep my sanity. I'm looking to revamp my blog and FB page as more as a general crafting/cooking/blogging resource than to promote my crafty business. The Etsy shop will still be up and I'll still list things to sell but it's not a huge priority for me anymore. Of course, any sales are appreciated as the monies made will go towards supplies so that I can keep making stuff :)
Saturday, December 29, 2012
Kids Art Case
I was asked this month to make this adorable art case for my friend's son. She sent in her son's fabric choices and her specs and this was the result. The case has a pocket for his color pencils and a velcro closure tab. I've seen ones made where there were individual pockets for each crayon or pencil. It was pretty easy to make considering that I've never made one before. I think I will make more of these in the future to stash away as kids gifts!
Wednesday, December 12, 2012
Pumpkin Black Bean Soup
2 cans black beans
1 large carrot, diced
1 can pumpkin puree
2 can of broth (beef, chicken or vegetable)
1 can corn
1 can diced tomato
2 tsp apple cider vinegar
1 tsp cumin
1 tsp red pepper flakes
Dump everything into a pot and let it simmer for an hour on low heat :)
I drained the beans and the corn but included the liquid in the tomatoes. I also used beef broth because that is what I had but next time, I am going to use vegetable instead.
I also like my soup chunky but you can always puree the tomatoes and beans if you like. If you puree the beans, make sure you have an extra can to add actual beans to the soup.
Next time, I am going to use dried beans instead as I try not to do canned stuff.
Wednesday, December 5, 2012
More Rick Rack Rose Rings!
A while back for my now failed craft challenge, I made some rick rack ribbon rose rings based on a tutorial I found on Pinterest. You can see my original post here. For a custom order, I wanted to experiment with mixing different colors. I have to say, I'm really love the black and white one!
I also made some smaller ones and glued them onto flatbback hair pins.
Wednesday, November 28, 2012
Instagram Bandwagon
I just got on Instagram recently and I'm already addicted. I love being able to use the filters artisfy (i made that up :) my images and to share with the world. Here's just a few of my favorite ones that I took. If you would like to stalk me, I would welcome it :)
Labels:
birds,
cat,
dandelion,
flowers,
gray,
hummingbird,
instagram,
josie,
nature,
photography,
red throated,
still life,
throat,
weed
Wednesday, October 31, 2012
Happy Halloween!
Labels:
all hallow's eve,
bat,
coffin,
fall,
felt awesomeness,
ghost,
grave yard,
gravestone,
halloween,
kawaii,
october 31,
pumpkin,
rip,
skull,
tombstone,
witch,
witch's hat
Monday, October 29, 2012
Halloween Monsters 2012
I made some new Halloween magnets for this year. I started out making the Bride and then there was a request for Frankenstein's Monster and from there, this set was born as another request. For me, every day is Halloween so I hope to eventually be able to add a Wolfman, Swamp Thing and maybe even Cthulthu monster!
Monday, October 15, 2012
Frankenstein Monster and Bride Magnets
RAWR!! I made this kawaii Bride and Frankenstein Monster set for a friend this week. I think I'm going to attempt to make some other Classic Monster inspired magnets as I really like how well these two came out.
Thursday, October 11, 2012
Tuna Pasta with Garlic and Basil
It never ceases to amaze me when I make up dishes and it actually tastes good. To give a little background, up until a few months ago, I hated cooking and only cooked basic. I'm not sure what changed but perhaps it was all the mouth watering recipes I kept seeing on Pinterest and wanted to try. Even then, if it looks difficult, I won't try it. That being said, I was starving today and did not feel like making a run to the grocery store so as I started looking through my pantry to see what I could put together with what I had, here it is...tuna pasta with garlic and basil. It's a fairly simple recipe for anyone who cooks regularly but it was a gold mine for me :)
Ingredients:
3 cloves of garlic
a handful of fresh basil leaves
olive oil
1 cup pasta (I used spaghetti noodles)
1 can tuna
a pinch of salt
a pat of butter
1 tablespoon olive oil and vinegar salad dressing
1 tablespoon of mayonaisse
1 teaspoon dried parsley (optional)
Cook the pasta according to the directions on the package. Mince the garlic and throw it in with the pasta. Add the dash of salt and 1 teaspoon of olive oil. I chose to add it to the water and also another teaspoon after the pasta was drained. I don't know why. But you can do either or both.
Once the pasta is cooked, drain it. Add in another teaspoon of olive oil if you want. Stir the butter in until it's melted. Mix in the tuna and the basil and then add in the mayo and then finally the olive oil and vinegar dressing.
And eat it up! As always, if you have any suggestions for this novice cook who still doesn't really like to cook but is willing to learn, please share :)
Labels:
food,
fresh basil leaves,
garlic,
parsley,
pasta,
recipe,
salt,
spaghetti noodles,
tuna
Saturday, October 6, 2012
Sequoia National Park Roadtrip
My friend and I took a 2 day trip up to Sequoia National Park to play with the trees and to chase some squirrels. I wanted to share some of my favorite pictures from the trip.
Kings Canyon Falls |
A not so shy chipmunk |
Sequoias at Grant Grove |
Early morning sighting of the moon |
General Sherman Tree |
Sunset on our first night |
Oh my stars! |
Spider web |
Saturday, September 22, 2012
Skull and Roses Messenger Bag and iPad Case Set
I really liked how the cupcake messenger bag I made for my now failed Craft Challenge came out so when I was asked to make one (along with an iPad case) for an order, I was excited. The messenger bag is lined with a stiffer red fabric and interfacing to give it more stability. Again, a front pocket was added for the smaller items.
This was my first time making an iPad case and I made it a little differently than I did with the Kindle cases I've made in the past. For this one, I added an outside pocket and a zipper opposed to a foldover flap for closure. Also used felt to give it added padding to help protect the iPad.
A matching tissue holder is also shown in the picture above.
Labels:
across the body bag,
case,
cover,
cozy,
creepy,
goth,
halloween,
ipad,
messenger bag,
over the shoulder bag,
pouch,
punk,
purse,
rockabilly,
roses,
set,
sewing,
skulls,
zipper
Thursday, September 20, 2012
Ruffle Purse
I made this ruffle bag for my friend, Karey who requested it after seeing this purse on Pinterest. I have to admit, this purse was a lot of work since I never read the directions thoroughly and just end up tackling the project head on after skimming the tutorial. Of course, there is actually a lot more detailing than what I normally have patience for and I have to say, I am once again pleased with the outcome. Enough that I'm willing to make another one or two as gifts.
Friday, August 31, 2012
Rick Rack Rose Rings
I have to admit that the 30 Day Pinterest Craft Challenge didn't go as well as I had hoped. Out of the 30 days of crafts, I managed to do 15 (not including two or three unfinished projects). I guess it's still not too shabby considering that I work full time among some other stuff I had been dealing with. I definitely learned a lot, making things I might never have, content with staring at the projects on the screen. I also learned a bit more with sewing and rediscovered my love and joy of making a new garment or bag.
To conclude this Craft Challenge, I am ending it with the rick rack rose rings I made. The tutorial from The Ribbon Retreat can be found here. I've actually (and am also in the process of making more) made a few more which I will post later (I haven't taken any pics yet). But overall, I loved how they turned out and already sold a few.
BTW, it's never too early to start shopping for Christmas! :)
Thursday, August 23, 2012
Project #14 - Craft Challenge - Hanging Dish Towel
Already had the hand towels (*ahem* washcloths) and the fabric so naturally when I saw the pin to make your own hanging dishtowels, I was stoked. I only had enough attention span to make one but I would like to make a couple more to rotate around when they get dirty. It was a pretty easy project and hardly took any time. This is the pin/post I used for reference but as usual, I didn't follow it and did my own thing (even tho it still looked like I followed directions :)
Yay for hanging dish towels!
Subscribe to:
Posts (Atom)