Monday, June 24, 2013

I got mooned!

One of my photography goals in life was to be able to take a picture of the moon with the crater details.  Which is a bit hard for me to achieve considering that I don't have a dslr (I have a hybrid camera which is a cross between a slr and a point and shoot).  But I try to take in as much info as I can on how to take moon photography with the type of camera I have.  In case you're wondering, it is possible to take a good picture of the moon not looking like a bright white dot with a point and shoot camera as long as the conditions are right and you have the tools for them.

This is how they usually turn out.


Tonight on my way home from work, I spotted the moon just as I was near my apartment and I was in awe at how low it was and how orange and not bright like it normally was.  Those were the perfect conditions for me and I hauled ass home before the moon left.  And here is my lucky shot.  This is what I've wanted (preferable without the wires photobombing my moon but I live in the city).  This is still a pretty rad shot for me tho.



Pin It

Friday, June 21, 2013

Fabric Basket - Pinterest Craft Challenge


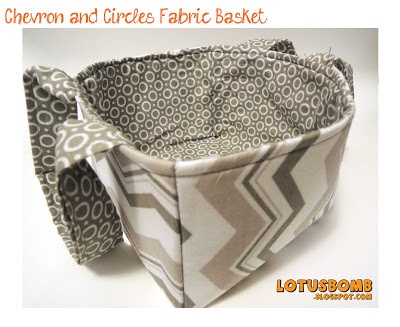
I found this fabulous fabric basket tutorial months ago on Pinterest and didn't have a chance to tackle the project until my friend mentioned she wanted one.  She just happened to have a birthday around the same time she mentioned it so I decided to make her one as a surprise (along with some fabric napkins and fabric kitchen towels we were trading services for).  This is the pin of the website I saw and the directions are fantastically easy.  I found some awesome gray and white chevron fabric and matching geometric circles at Joann's.   

Here are some pics from different angles of the basket.  In one of the pics, I filled the basket with the napkins I made for her.  I'll have a separate post for the napkins later.


Pin It

Thursday, June 20, 2013

DIY Boatneck Shirt from Scratch!


A couple of weeks ago, I decided that I wanted to make a shirt from scratch.  Using one of my XL t-shirts that I sleep in, I basically cut out  a "T" from this awesome gray and black striped knit fabric that I got from Michael Levine in downtown L.A.  Using the same method as when I'm refashioning my concert shirts, I opted for a boatneck and banded bottom (what can I say?!  I just love this style!).  I also added cuffs to the sleeves and added a hem to the collar to give it a cleaner look.  Once again, I'm very pleased with the outcome and the knit shirt is so incredibly comfortable.


Pin It

Tuesday, June 18, 2013

DIY Custom Labels


For a while,   I've been putting off getting custom labels made for my sewing projects.  I know I desperately needed to brand my items but I didn't have any artwork ready and continued to put it off.  The other day, I decided to get my artwork together for my labels and hunted on Etsy for a vendor.  I really don't have patience to put my projects on hold while I waited weeks for my labels.  Then I decided to see how hard was it to make my own.  It wasn't.  Considering that I already had everything except the twill tape, which I got here.
 
Twill tape, Fray Check, transfer paper and parchment paper (not shown) are needed for the labels.

Really, if you can put together some artwork, print it out backwards on the transfer paper and iron, you're all set.  You might have to add some finishing touches like sealing the ends with Fray Check.  Other than that, it's pretty simple. 

Don't forget to print out your artwork backwards.
 Here is the tutorial I followed to my make own.  And no having to wait weeks for them to be ready.  Unless you're putting them off.    


Pin It

Friday, June 14, 2013

I Came. I Sew. I Conquered.

While doing a search for a sewing machine clipart,  I saw this fantastic sewing machine silhouette from A Lemon Squeezy Home.  Last night as I was going to bed, my brain decided to have a witty moment playing on Caesar's famous words "Veni.  Vidi.  Vici" (I Came.  I Saw.  I Conquered).  My witty moment may not actually be that original but I did have it and had to get it out before I forgot (thus the sewing machine image hunt).  This is exactly how I feel when I tackle any sewing project.  I came.  I sew.  I conquered. 

When I have more time later, I am going to actually be creative and translate my idea into a painting and have it hung up.  For now, this is the quickie photoshop version.


Pin It

Thursday, June 13, 2013

Tyrsa's Button Up Clutch


By now, I pretty much use the same basic pattern when making most of my bags or pouches.  It's clean, it's easy and it looks like nice.  So, that being said, this clutch I made for a coworker for her birthday is no different.


The inside boasts the main compartment and and outer pocket much like the phone cozy and ID wallets I make.


The outside has a vintage button elastic closure.  This particular vintage button is from my grandmother's collection.  I can now say I am obsessed with vintage buttons.   


I started out with the idea of making her a wristlet but somehow it became a clutch instead.  Turns out, the girl had been wanting a clutch so I must have known that unconsciously :D

 (Special thanks to my friend Genevie for modeling the clutch)


Pin It

Tuesday, June 11, 2013

San Francisco Giants Decoupaged Bottle


As part of a friend's birthday package, which included this Mickey cup cozy and this Mickey/Fantasia-esque phone case, I also made her SF Giants themed decoupaged bottle.  She's a huge fan of the Giants so I thought this would make a pretty awesome and useful gift.  I printed out the SF logo, cut it to size, decoupaged and then blinged it up. 


To make your own decoupaged bottle, go here.


Pin It

Saturday, June 8, 2013

Button Up Phone Cases


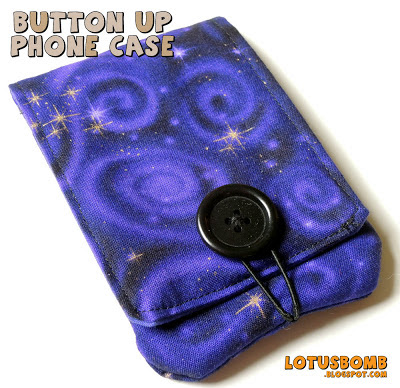
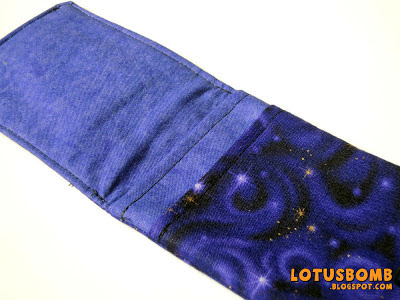
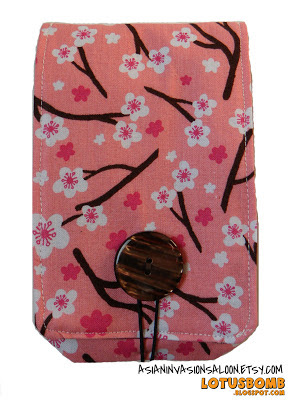
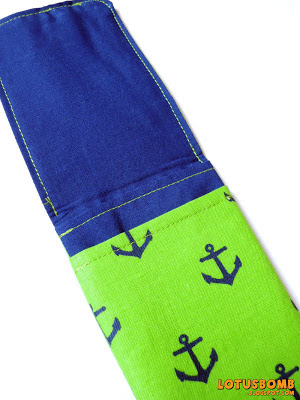
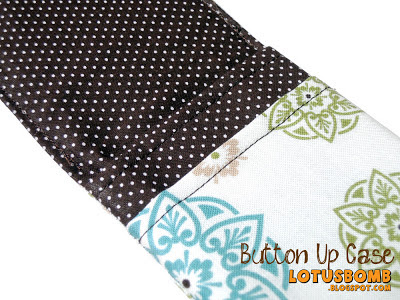
One of my best sellers are the Button Up Phone Cases I make.  I can't make them fast enough to list before they're sold.  I've experimented over the years and love the button closure opposed to the velcro tape, snap buttons,and ribbon strap.  The button closures give me an excuse to use up the buttons in my collection and gives more of a cleaner and professional look.

I always try to coordinate the outer fabric with the inner one to give it a more cohesive look rather than just randomly choosing two pieces, which would make it much easier but just not as purty!

And, not only can they be used for your phone, they can double as your point and shoot camera case too.


Here are a few others that I've made:


Pin It

Mickey Cup Cozy


I recently made a Mickey Mouse themed cup cozy for my friend for her birthday.  She loves Disney, loves purple and loves coffee.  I found this tutorial a couple of years ago but never got around to doing anything with it until her birthday.  I also didn't have a paper cup to wrap it around with so I wrapped it around her Starbucks gift card instead. 


Back view of a button and elastic closure.
This was actually pretty fun to make.  I think I am going to experiment with my own designs as it will make a great gift and will be more environmentally friendly without having to use the cardboard sleeves coffee shops provide. 


Pin It