Showing posts with label dress. Show all posts

Monday, May 5, 2014

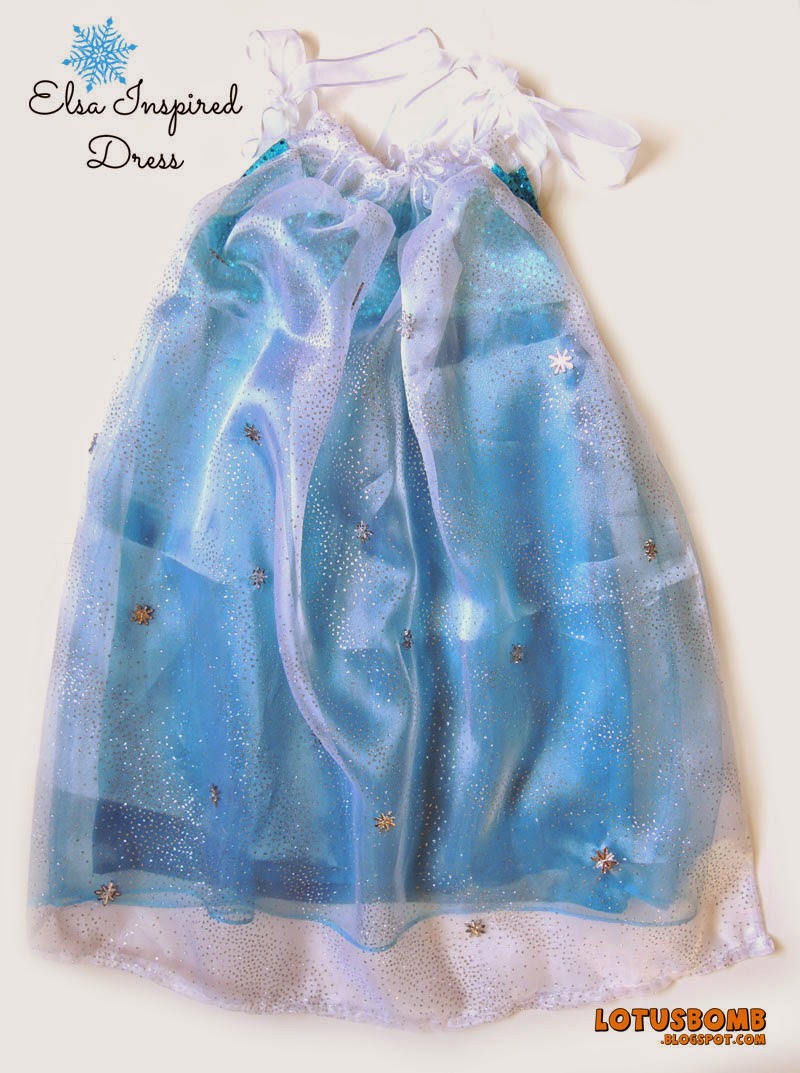
"Frozen" Inspired Elsa Dress


I would not have attempted to make a Frozen inspired Elsa dress if my friend hadn't asked me to make one for her almost 4 year old daughter.  And when I agreed, I already started constructing it in my head even though I haven't seen the movie yet.  Once again, I've surprised myself.   There's definitely some improvements I can make, but overall, I think this came out pretty darn cute and I think the said little girl will like her new dress. 

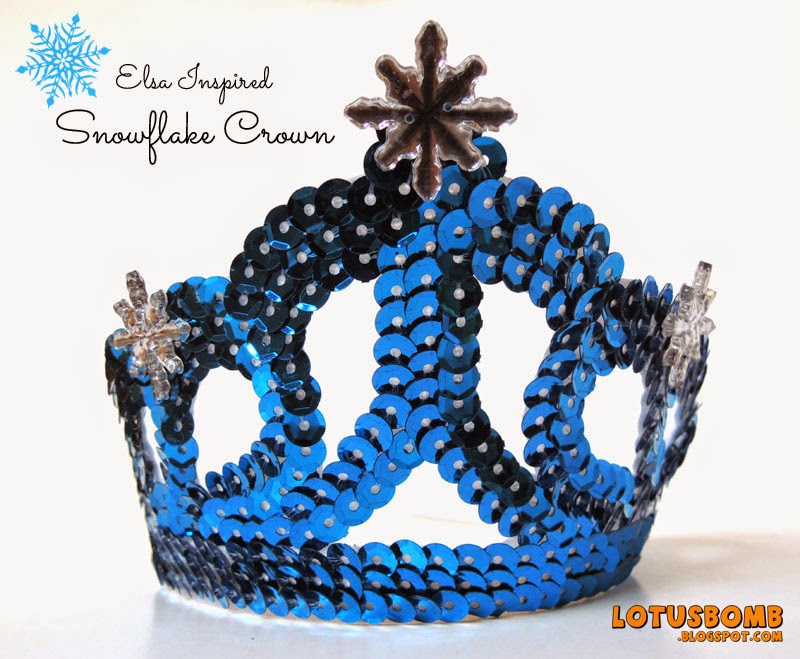
The dress had many components.  Normally, I would be intimidated but I didn't really think about it and just dove right in.  (It did help that there was a little girl on the opposite of the country waiting as patiently as she could for her dress).  I couldn't find anything with snowflakes on it (very surprised by the lack of considering how big Frozen is right now) but I did manage to find some sparkly material for the cape and snowflake buttons that I sewed in by hand.  I also added in a sparkly tulle overlay to make the dress more Princess (er, Queen) like.  To top it, I found a very inexpensive blue crown that happened to match so I glued on some extra snowflake buttons to make it more snow queen-ish.

The back of the dress with attached cape.


The snowflakes were sewn by hand.


The Queen is not complete without her crown


Pin It

Tuesday, August 13, 2013

Mod Circles Dress


This dress started out as a sheath dress and I just didn't like it how it turned out.  Since I had a little bit of fabric left over, I decided to transform it into a 1/2 circle dress.   I found the fabric a few months ago at Joann's in the their Calico cotton section.  It's a dark brown background with circles in various shades of blues.

I pretty much winged it and didn't use a pattern although I did draft my own for the skirt portion.  For the top, I cut out the fabric in a "T" shape, added a couple of panels in the front bodice and added a zipper in the back. Adding darts in the front and back helped to make it more fitted. 

For the first time since I started sewing, I made a full dress with very little mistakes and an incredible amount of patience that I have no idea where it came it from.  It's still a little shorter than I like but I worked with what I had left and I absolutely love how this came out!


Pin It

Thursday, July 18, 2013

Tiki Maxi Dress


So I've never been much of a fan of maxi dresses.  The reason being is that in my mind, a maxi dress makes me look more height challenged than my 5'2" awesomeness.  Whether that is true or not, I don't care anymore.  I've seen many tutorials on Pinterest and for some reason this one resonated with me and it felt right to make one.  Maybe it was the title (Easist DIY Maxi Dress Ever).  Maybe it's because she's a fellow Asian.  Maybe it's because of her choice of fabric and how beautifully her dress came out.  Whatever it was, her tutorial was the one I chose to follow.  It really wasn't hard at all.  Considering that the style is very similar to the pillow case style dresses and shirts that I'd been making.  I've had this summery Tiki fabric in my stash for a long time and toyed with the idea of a swing dress or a wiggle dress.


In the end, the maxi dress won out.  I had to add side slits up to my knees in order to be able to walk unconstricted.  Admittedly, when I finished the dress and I tried it on, all I could see was a mumu.  Once I added on the wide belt, it was completely transformed.  This dress will definitely be making the birthday road trip with me to Arizona at the end of this month.


Pin It

Tuesday, August 14, 2012

Day 11 of the 30 Day Pinterest Craft Challenge - Gather Skirt

 
The inspiration:  Gather Skirt (an Etsy tutorial)


My version: 

I didn't exactly follow the tutorial (no surprise there) but once again, I didn't have enough fabric so I added a white hem.  I originally added in a ruffle hem but it didn't look right.  Not to mention, the original ruffle I added was the same fabric print as the skirt but when I was near done, I realized I didn't have enough of the fabric.  So, out came the seam ripper, then added in the white ruffle, didn't like the way it looked, ripped that out and finally just added in the basic white block hem.  Although I pre-washed the fabric, it's still a little stiff so hopefully, after a couple more washes, it will soften up and lay not so poofy.  Overall, I do like the skirt and the cherry blossom print. Although the hem could use some ironing :)
  

Pin It

Friday, August 10, 2012

Day 7 of the 30 Day Pinterest Craft Challenge - Striped Dress

Funny how so far, every project for this challenge that I've embarked on has not quite come out the way as they were posted and pinned.  This project was no different.  This is the original inspiration pin from Handmade Mess:

Easiest Skirt in the World- Handmade Mess [Now I just need ... basic sewing skills...]


This is what I ended up with:


I really had all intentions of making the "easiest skirt in the world" but when I tried on the skirt, it was too long.  So I trimmed about 12 inches.  When I tried it on, it was too short.  I am way too old to be wearing a skirt 3 or 4 inches above my knees so I had to improvise.  First came the bodice, which took me a little while to figure out how I wanted to make it.  It started out as a tube top with straps but the fabric is really, really, really stretchy so that wasn't working.  The back kept bunching up, the front looked all wonky.  I then had a light bulb moment and I made some adjustments.  I cut out armholes and decided to make the top like how I made this shirt from my Day 3 Craft Challenge.  Perfect!  The back didn't bunch up anymore and the front became more flattering.  I added in a 3 inch ruffle to bring the dress down to my knees.  I didn't have the patience to pull the basting stitch to create the ruffles so I ended up using a piece of elastic I found laying around.  For the straps, I just looped in a raw strip of jersey knit from my stash.  You can't really tell the straps have raw edges but I like that look in moderation so I ended up leaving the hem of the ruffle raw as well.  

Overall, I really liked how it turned out.  I wore it out to lunch yesterday with the BFF (Marisa from Sukoshi Shop) and she was also rad enough to help me take some pix of me wearing the dress.

Here's the back view:


BTW, this dress was finished on the 8th but I had internet problems last night after I came home when I was trying to post this entry so here it is now :)

Pin It

Tuesday, August 7, 2012

Day 5 of the 30 Day Pinterest Craft Challenge - Circle Skirt


I love love love circle skirts and dresses so it was a no brainer when I saw this post from iCandy on Pinterest that I would be making this.  Drafting my own pattern was easier than I thought but this did take me longer than I expected because I'm super picky and kept trimming and trimming until I was satisfied.  Then it took me over a half hour to add on the black and white piping only to realize when I was finished that I wasn't loving it.  I didn't like how it makes the bottom of the skirt a bit wonky because it tends to curl.  And it made it a bit more fancy than I wanted for every day wear.  I think if the trim was on a stiffer cotton material opposed to the jersey knit, it would not curl as much.  I wanted to post this up to make sure I wasn't slacking for the challenge but I'll be removing the trim this week so that it will be more simple.  I'll just save the trim for another dress. 

Pin It

Thursday, August 2, 2012

Day 1 - Pinterest 30 Day Craft Challenge - Bandana Pillowcase Dress

This bandana pillowcase dress I made today is the first project of the Pinterest 30 Day Craft Challenge based on the crafty pins on one of my boards.  My project was inspired by this bandana pillowcase dress by Trey and Lucy and this patriotic pillowcase dress by Aesthetic Nest.  I love the ruffled hem from the patriotic dress and when I saw the bandana dress, I knew I wanted to combine both pins into one project. Wish I had a handy kid around to model this dress!


Pin It