Showing posts with label fashion. Show all posts

Wednesday, September 17, 2014

T-Shirt Refashion: From a Kid's Shirt to a Woman's Shirt

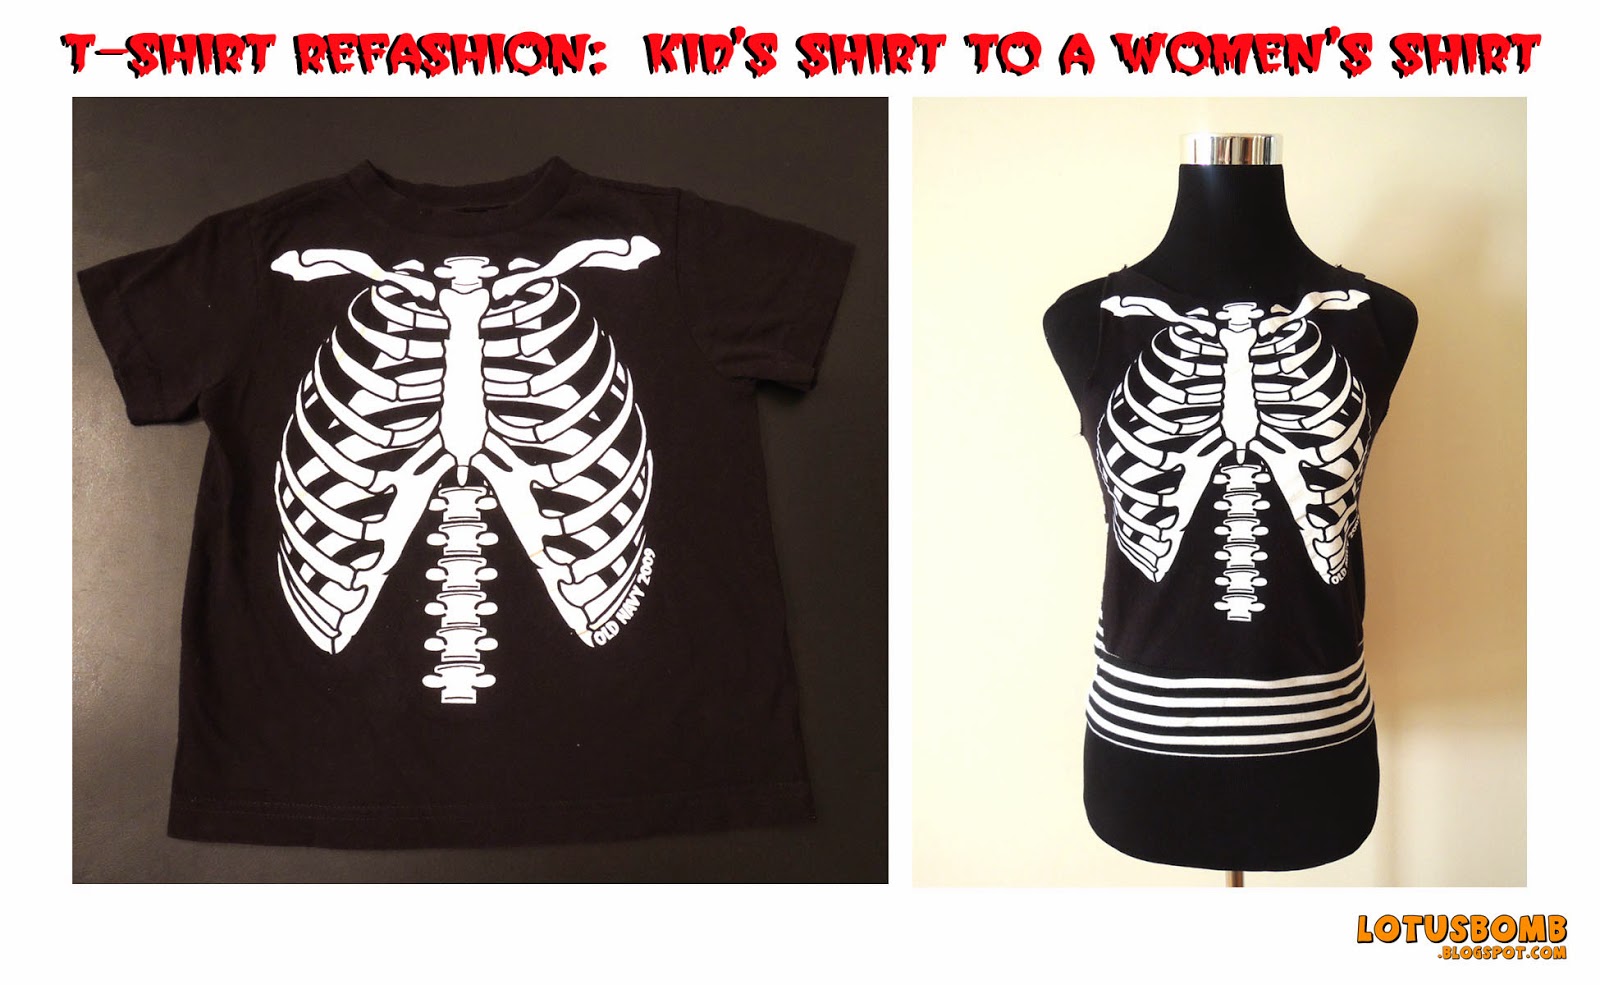
How many times have you gone shopping for a kid and see a pattern or design you like and thought "I wish I could wear this"?  With a some sewing skills (or a friend with sewing skills), you can covert a kid's shirt to one you can wear :)

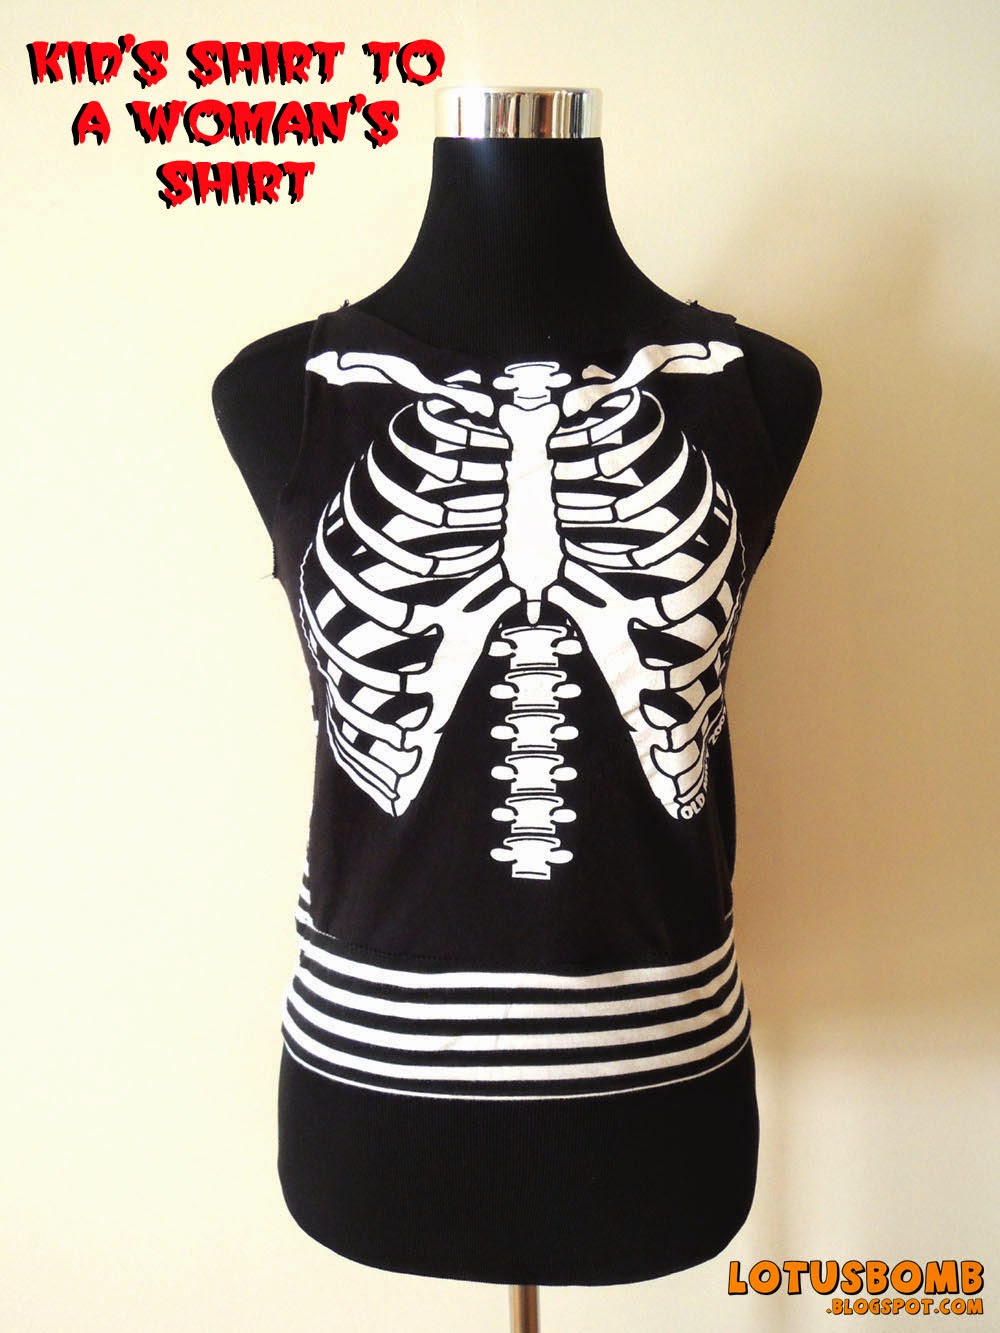
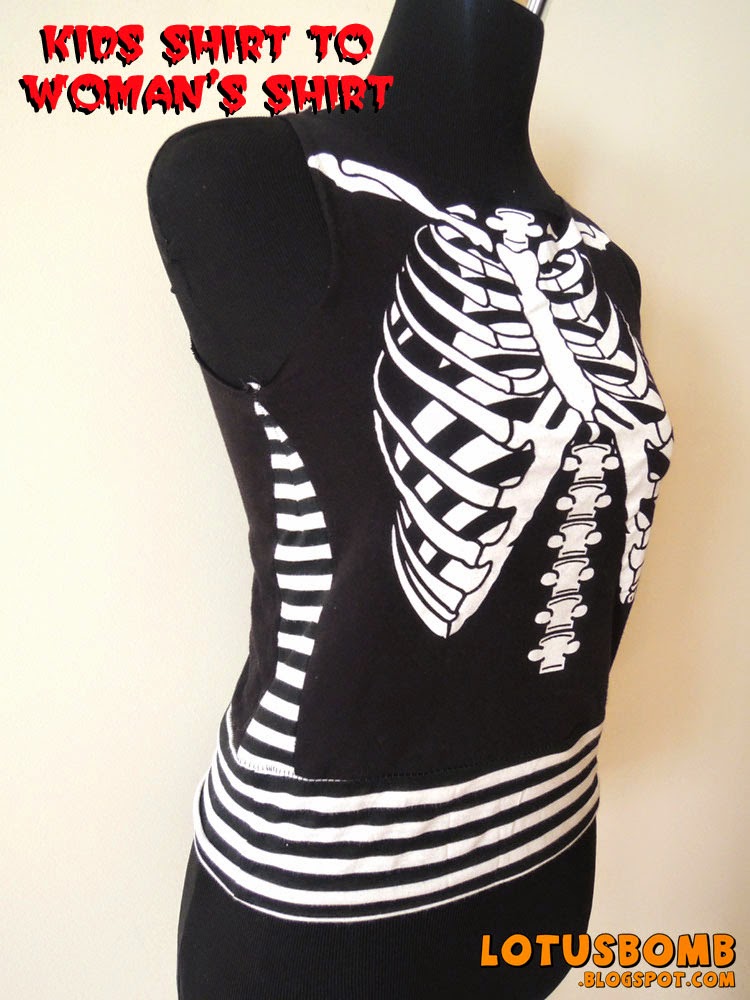
My cousin gave me this shirt that her 6 year old son outgrew so I did stuff to it so that *I* can wear it.  Humerously (see what I did there?  haha), after the redo, the ribcage on the shirt seemed to line up perfectly on my body.

Sixe 5 Kids Shirt
I cut off the sleeves and the collar, added side panels to widen the shirt and a band on the bottom to lengthen.  I kept the edges from the cut collar and sleeve holes raw. 


Pin It

Wednesday, May 28, 2014

The Mavericks Refashion

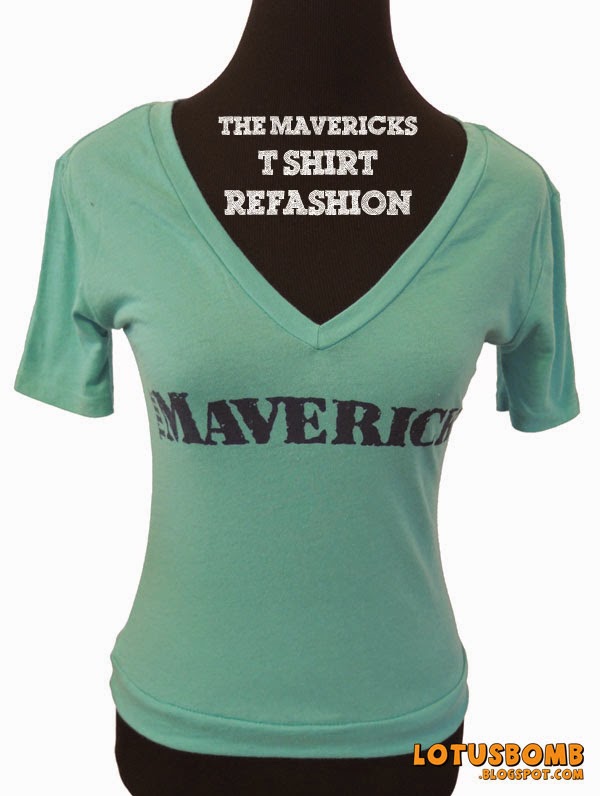
 I just love transforming regular t-shirts and making them into something different.  This is The Mavericks shirt I redid that I got at the last show I saw them at in L.A in April. 


Here's another quick redo I did with this Mavericks shirt.  My original plan was to turn this around so the V was on the back but I liked how it looked better in the front as it is supposed to be.  Just a simple refashion where I took in the sides and added in the banded bottom.  I kept the sleeves on and took it in a little to give the shirt a more feminine feel .

Before the redo.
The back of the shirt


Pin It

Thursday, May 22, 2014

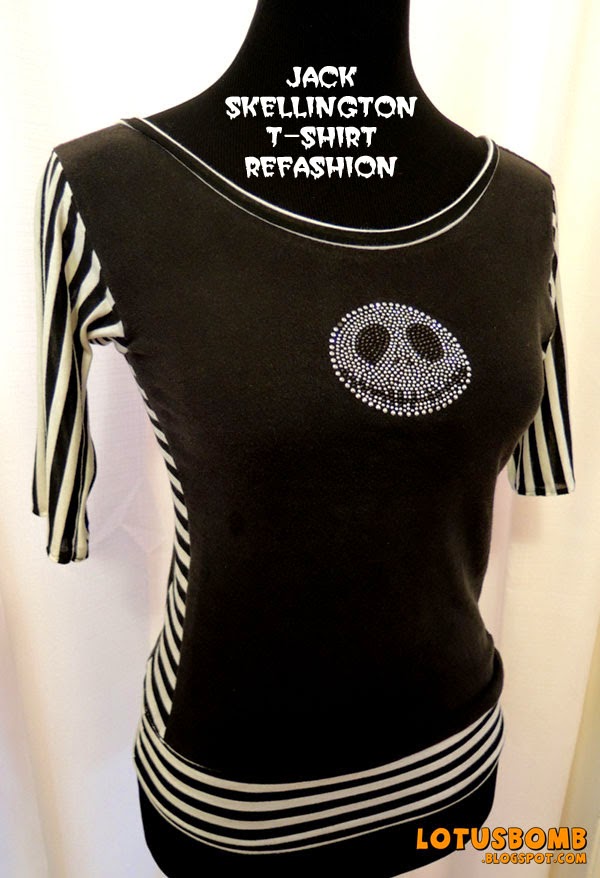
I Didn't Mean To Make This: Jack Skellington Refashion Tee


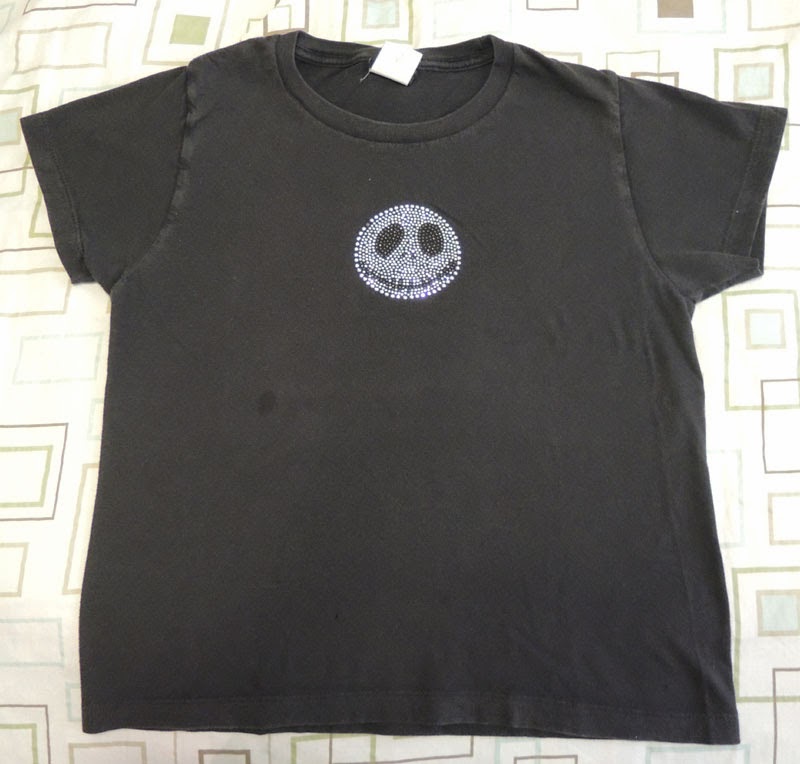
I totally did not intend for this recon shirt to come out the way it did.  Originally, it was supposed to be a simple resizing recon.  The original shirt was given to me by one of my best friends years ago and I wore the heck out of it.  Color fading, a hole in the shirt and a stain is an indication of how much I love shirt.  However, over time, I wore it less and less because I didn't like how short it had become or how boxy it was (although I still wore it occasionally).

My plan was to take in the sides and sleeves and to lengthen it.  Well, I did all I had planned except the sleeves ended up being too tight so I ended up taking out the sleeves but still wasn't happy with it.  I wanted to make something different from what I normally make.  So I went back to my computer to do some research on how to add sleeves.  Like zippers, adding in made-from-scratch sleeves intimidated me.  But intimidate no more.  Like putting in zippers, once i got the hang of it, it was easy peasy.   In fact, putting in sleeves is a lot easier than putting in a zipper. 

This simple recon ended up taking a few hours because of the sleeves and the collar hem.  Not to mention, the striped fabric was being ornery.  In the end, I won.  I shall now be wearing this shirt until the sleeves fall out.

Here are some more pics...


This shows how boxy and short the original shirt was.


Pin It

Monday, May 5, 2014

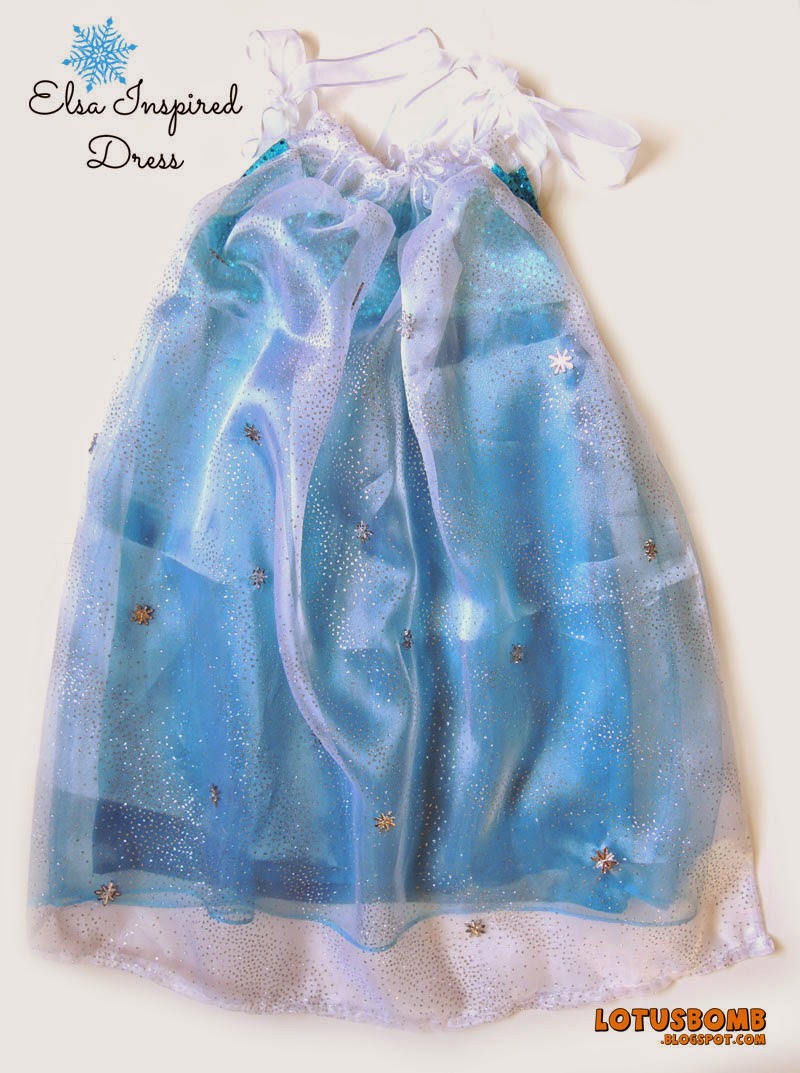
"Frozen" Inspired Elsa Dress


I would not have attempted to make a Frozen inspired Elsa dress if my friend hadn't asked me to make one for her almost 4 year old daughter.  And when I agreed, I already started constructing it in my head even though I haven't seen the movie yet.  Once again, I've surprised myself.   There's definitely some improvements I can make, but overall, I think this came out pretty darn cute and I think the said little girl will like her new dress. 

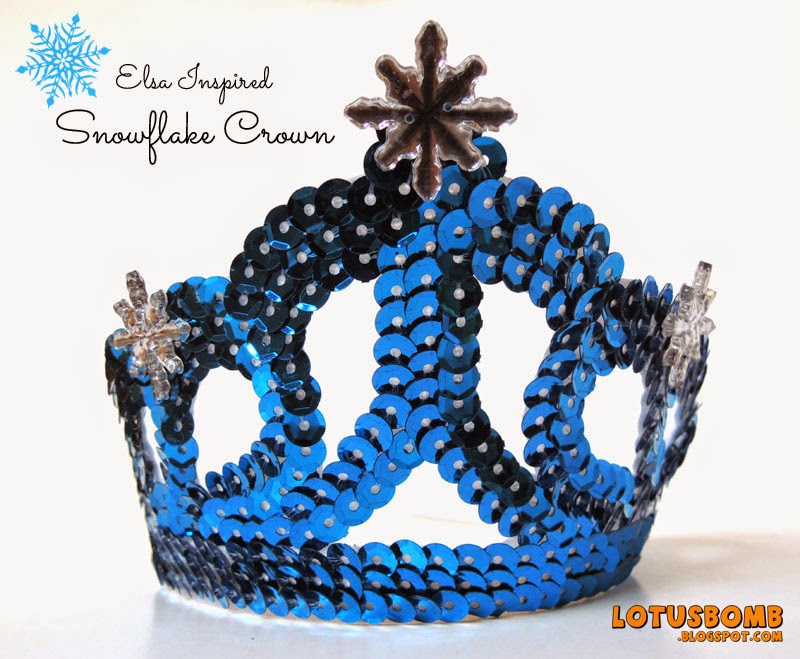
The dress had many components.  Normally, I would be intimidated but I didn't really think about it and just dove right in.  (It did help that there was a little girl on the opposite of the country waiting as patiently as she could for her dress).  I couldn't find anything with snowflakes on it (very surprised by the lack of considering how big Frozen is right now) but I did manage to find some sparkly material for the cape and snowflake buttons that I sewed in by hand.  I also added in a sparkly tulle overlay to make the dress more Princess (er, Queen) like.  To top it, I found a very inexpensive blue crown that happened to match so I glued on some extra snowflake buttons to make it more snow queen-ish.

The back of the dress with attached cape.


The snowflakes were sewn by hand.


The Queen is not complete without her crown


Pin It

Wednesday, January 22, 2014

Social Distortion Refashion Tee


This is officially my new deconstructed refashion men's t-shirt.  I've been wanting to incorporate fabric into a remake but never really had the time to figure it out.  I love Social D and love how this came out.  I used a black and white striped jersey knit for the side panels and the band.  As always, I cut off the crew to make the shirt more feminine and added elastic to the inside top of the sleeveless part to make it shirred.  Yay for a new shirt!


Pin It

Wednesday, December 25, 2013

"Pillowcase" Top Tutorial


Back in August of 2012, I posted a shirt (this one) I had made based on a shirt I saw on Pinterest.  I was recently asked to make a tutorial for that shirt so here it is!  Would love to see your version so please post a link in the comments.

Materials:
Knit fabric of your choice
A strip of knit fabric of your choice (about 36 inches long or more and 2 inches wide)
Your favorite shirt that fits lengthwise
Sewing machine
Matching thread.

For this shirt, I chose a slate gray jersey knit fabric and black jersey knit for the tie.

 Bodice.
 1.  Measure your bust and add 1.5 inches to both sides.  An inch will be for seam allowance and the extra is to give your shirt some room.   I have a size 32 bust and fairly petite so my shirt ended up being about 34" wide after I sized it down from the below measurements.

Take your bust size, divide by 2 and add 3.  For this tutorial, we will be using my  measurements.
32/2=16+3=19" width

For the length of the fabric, measure your favorite shirt from top of shoulder down to the bottom minus 2 inches. 

 Leaving your fabric folded in half, cut a rectangle based on your measurements so you have two pieces.  It is not necessary to cut on the fold as the two rectangles need to be separate.   


Sleeveless hem and tie casing.
2.  Measure 9 inches from the top down on both sides and mark it lengthwise with a pin.  The fabric above the pin will be for the armholes and casing for the tie.  Sew from the pin down on both sides using a straight stitch. 


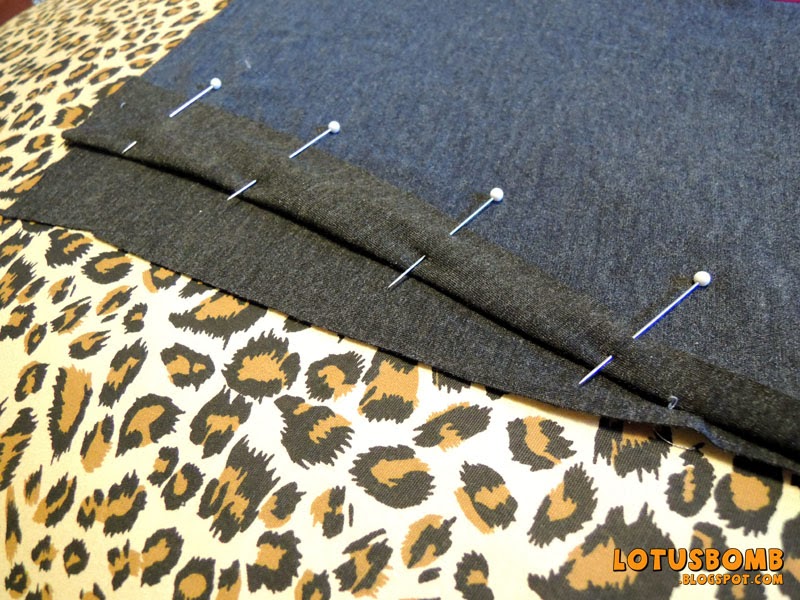
3. Starting where the fabric opens up to create the sleeveless hem, fold your fabric at an angle towards the middle of the shirt and pin.  The fold should be a slight diagonal.  Do this on both sides for each piece of fabric.  Using a 1/4" seam allowance, sew each hem.  For the beginning sewer, you will be sewing four times so be careful to not sew the folded hems to one another :)


4.  Once the sleeveless hems are sewn, for the casing, fold the top of the shirt down an inch and pin.  Do the same for the other side.  Using a straight stitch and leaving 3/4" from the top, sew across lengthwise.  You want to be sure to leave about 3/4 open for the tie to be pulled through.  


Bottom (banded) hem.
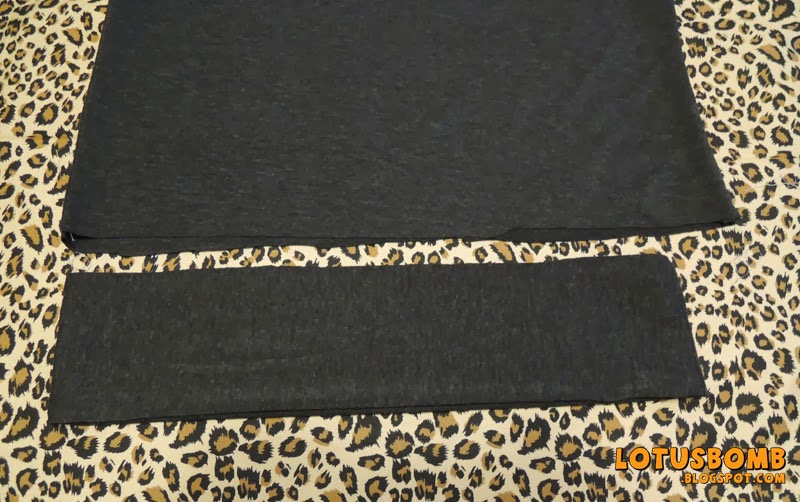
5.  Cut two pieces of fabric about five inches tall and two inches smaller than the width of your shirt.  For my shirt, the width was 19 inches so I cut this fabric 17 inches.

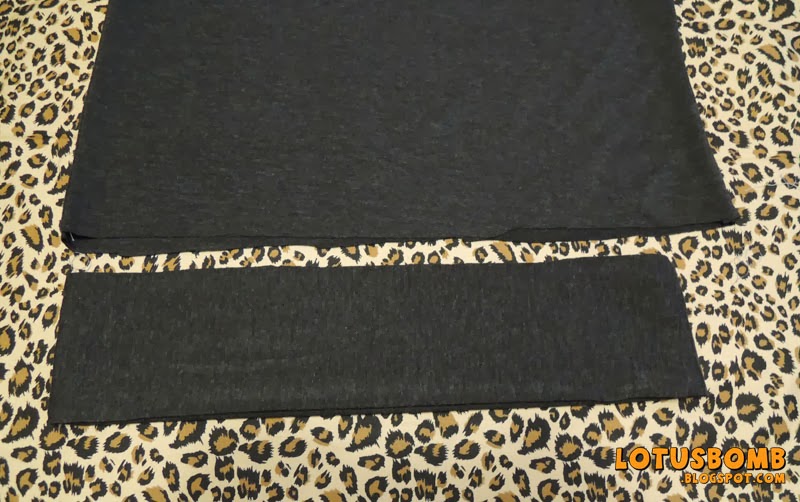
The two pieces needed for the banded hem.


6.  Sew up each side so you end up with a tube.  Now, take the top part of the tube and bring it down so that it meets the bottom part so the seams are inside.


7.  Your banded hem should look like this now. 


8.  Slide the tube over the shirt matching the raw edges together so the tube is "hugging" the shirt.  Pin the tube side seam to side seam with the shirt and center to center.  You should have some loose fabric from the shirt in between the pins.  Using a zigzag stitch, sew the edges together, while stretching the band to "fit" the shirt. 

I forgot to take a pic of the next step so luckily I had a pic from a previous shirt project. 

The banded hem should be "hugging" the shirt.


Once the banded hem is on, your shirt should look similar to this (once again I forgot to take a pic so this pic is from another project).


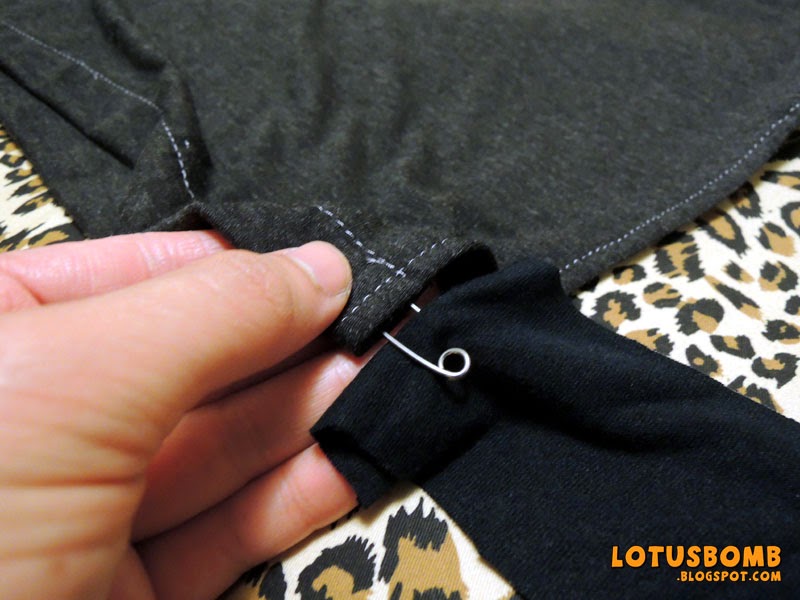
9.  Using a safety pin, pin one end of the strip of fabric and pull it through both of the casings. 


Tie the ends together into a bow or if you don't like the bow, adjust the length to your preference and sew the ends together and pull it through the casing to hide the seams.

And you're done!

I hope the instructions were clear but if you have any questions, let me know.  It's a pretty simple project but I may have given too much details :) 
Pin It

Saturday, November 23, 2013

Shirt Refashion: Mod Inspired Dress from a Polo Shirt.


I was cleaning out my closet the other day when I came across some black polo shirts I had used for work before they issued us uniform shirts.  My first thought was to donate them and then my second thought was "wait, I can make something out of these".  Voila!  What came about was a mod inspired dress.  In a nutshell, the shirt was too short to wear as a dress so I added some dark gray jersey knit fabric to add some length, took in the shirt and sleeve some so it hugged my body more and added in a peter pan collar.  It was a fairly easy revamp. 

I am working on a tutorial so I willl hopefully have that up soon.  In the meantime, please do like my facebook page as that will be the first place I will update with the tutorial. 


Pin It

Saturday, September 28, 2013

Peekaboo Lace Web Shirt


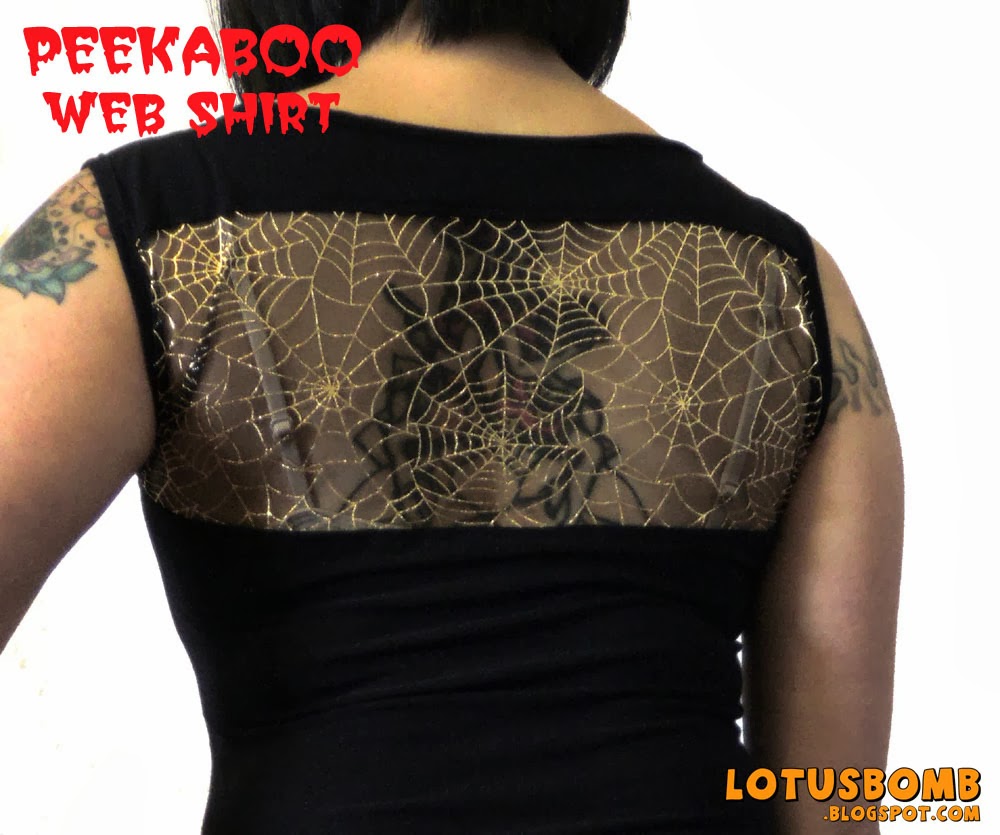
It would seem as though I made this peekaboo web lace shirt just in time for Halloween but alas, that is not the case.  Truth is, I have a shit ton of gothy lace material that I've gotten over the years but never did anything with and my brain starting putting together another idea and it just happened the timing coincided with October.  Once again, I'm uber pleased with how this came out.  I used a stretchy knit/lycra blend fabric from Joann's and a webby lace/tulle kind of material that I got from Joann's years ago.  Happy Every Day is Halloween!

Peekaboo Back!


Pin It

Friday, September 20, 2013

Navy and White Bow Shirt


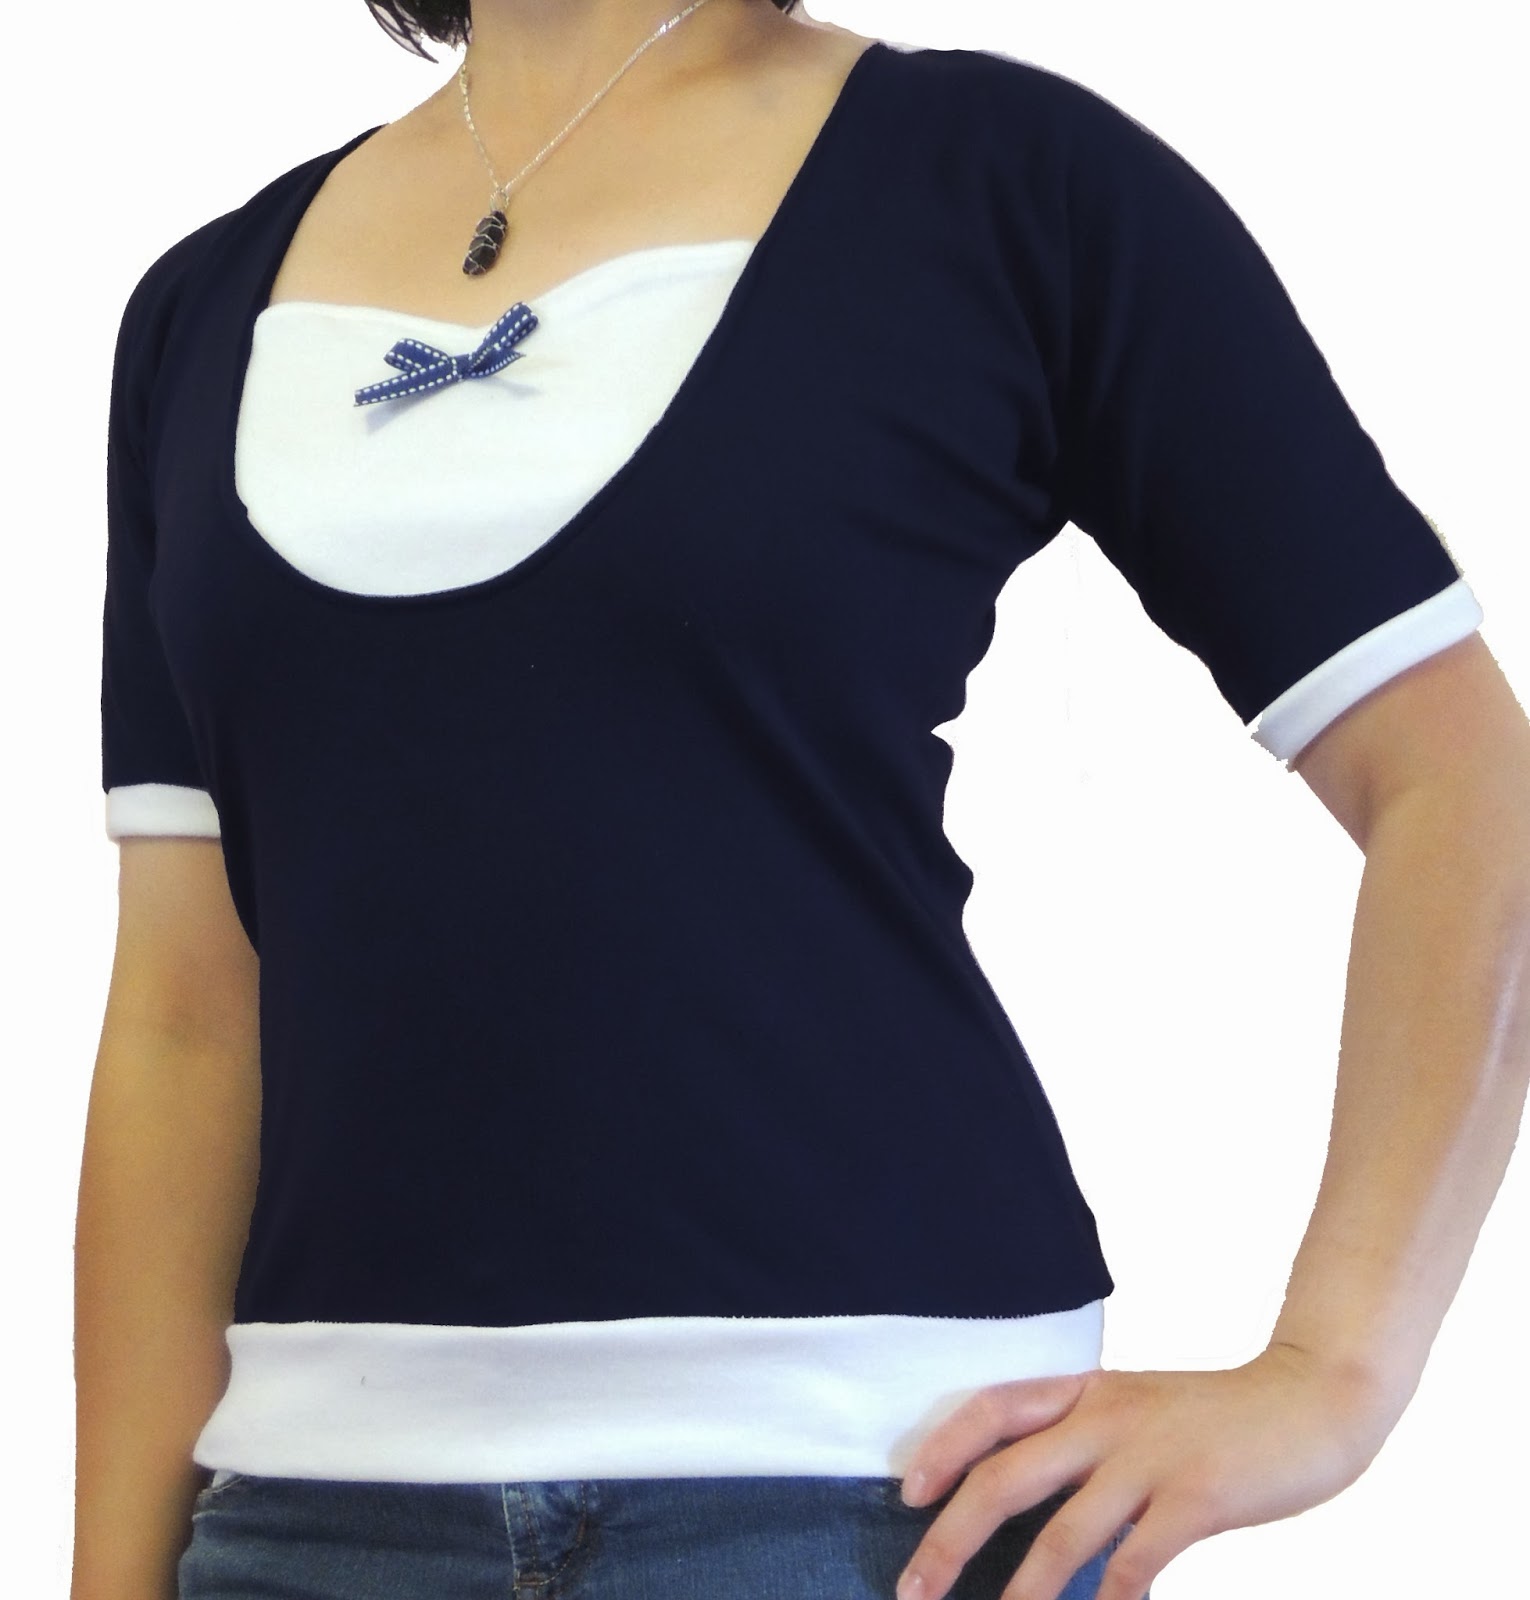
This shirt was inspired by some nautical themed tops that I've been seeing on Pinterest.  As always, what started out as an imitation turned into my own thing.  This was the original pin that I was inspired by.  My version is similar but still different.  I made this from navy and white knit fabric and added a navy and white ribbon bow instead of buttons for the details.   I opted for the ribbon detail because I didn't have enough buttons and was too lazy dangerous to go out to get some.  Going to Joann's is a lot like going to Target.  You never walk out with just the item you originally went to get.

Anyway, I'm pretty pleased with how this turned out. Definitely comfy and a change from all the boatneck shirts I've been making. 

Bow Detail


Pin It

Thursday, August 15, 2013

Before and After: Botched Pencil Dress to Gorgeous Wiggle Dress

Something must have "clicked" over the last few months when I started sewing clothes again.  This is the second dress I've made within a 7 day period from start to finish with little mistakes.  The latest finished dress is a rockabilly style wiggle dress.  I attempted to make one last year but didn't exactly follow directions and tried to wing it and it came out bad.  Like really bad.  So I put it away and out of sight, out of mind.  I decided to pull it back out a few days ago and try to salvage it.  There's nothing worse than wasting large amounts of fabric on something not finished.  So, armed with patience and a whole lot more knowledge, I have a gorgeous wiggle dress that I can't wait to wear out!

The original disaster dress that didn't fit right because I tried to wing it.
 I didn't like how I made the bodice on the original dress so I used the skirt part to make a new one.  I originally intended for the bodice to look more like the one I made on this dress last week but I ended up changing it into a boatneck.  The scoop neck wasn't working for this dress.  I knew I wanted a wiggle dress of some sort so I did a lot of research on Modcloth and Pin Up Girl Clothing to find as inspiration.  In the end, I used black twill fabric to make the skirt portion.

The gorgeous redo.
I'm so happy with how this turned out.  It's definitely a confidence booster knowing that I can make garments that fit well. 


Pin It

Tuesday, August 13, 2013

Mod Circles Dress


This dress started out as a sheath dress and I just didn't like it how it turned out.  Since I had a little bit of fabric left over, I decided to transform it into a 1/2 circle dress.   I found the fabric a few months ago at Joann's in the their Calico cotton section.  It's a dark brown background with circles in various shades of blues.

I pretty much winged it and didn't use a pattern although I did draft my own for the skirt portion.  For the top, I cut out the fabric in a "T" shape, added a couple of panels in the front bodice and added a zipper in the back. Adding darts in the front and back helped to make it more fitted. 

For the first time since I started sewing, I made a full dress with very little mistakes and an incredible amount of patience that I have no idea where it came it from.  It's still a little shorter than I like but I worked with what I had left and I absolutely love how this came out!


Pin It